
Tools: screws, adjustable wrench, washer, spring washer, nut, flat screwdriver, cross screwdriver, hex wrench, wire stripper, waterproof tape, compass.
Step 1: Select the appropriate installation location.
Solar street lights need to receive sufficient sunlight in order to generate electricity, so the installation location should be chosen in an unobstructed area. At the same time, it is also necessary to consider the lighting range of the street lights, ensuring that the installation location can cover the area that needs to be illuminated.
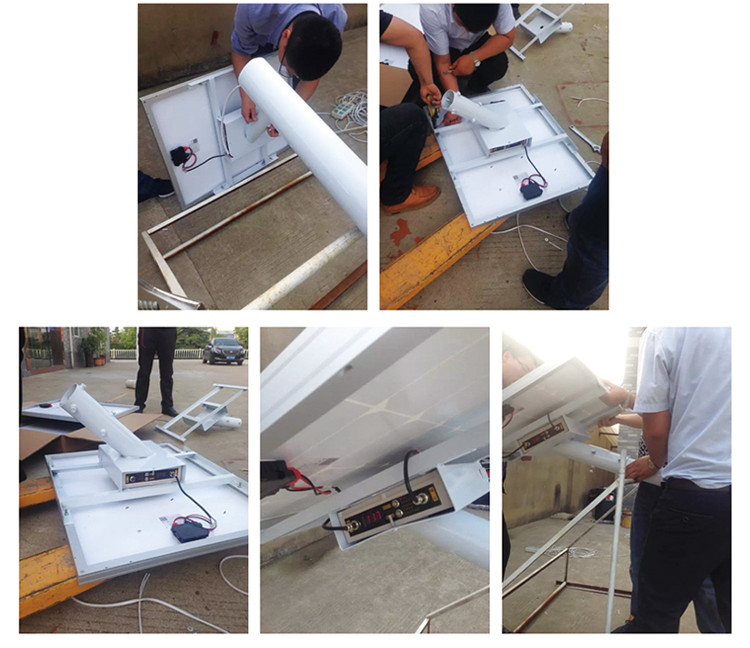
Step 2: Install solar panel
Fix the bracket on the ground using expansion bolts. Then, install the solar panel on the bracket and secure it with screws.
Step 3: Install LED and battery
Install the LED light on the bracket and secure it with screws. Then, when installing the battery, pay attention to the connection of the positive and negative poles of the battery to ensure proper connection
Step 4: Connect controller with abttery
When connecting, pay attention to the connection of the positive and negative poles of the controller to ensure correct connection.
At last, the light need to do test to check: a. whether the solar panel can generate electricity. b. whether the LED lights can illuminate properly. c. ensure that the brightness and switch of the LED light can be controlled.
Post time: Dec-06-2023